Now that you’ve got the basics of how to setup a Facebook Business Page in place, it’s time to think about ways to optimise your Page to maximise engagement and meet your Facebook marketing goals.
Add a call to action
There are hundreds of reasons why people visit your page, and you may not be able to provide them with all the information they need right on your Page. But you can provide them with a way to get it by setting up a call-to-action (CTA) button.
Facebook’s built-in CTA button makes it virtually frictionless to give the consumer what they’re looking for, including allowing them to engage with your business in real life.
By default, Facebook adds a Send Message button, encouraging visitors to contact you through Facebook Messenger. But you can change this to allow visitors to learn more about your business, shop, download your app, or book an appointment.
To customize your CTA, hover your mouse over the Send Message button on your Facebook Page, then select Edit Button. Choose the type of button you want, then select the specific message to appear on the button. When you’re happy with your choice, click Next.
 Depending on the button you chose, you may be asked to select some additional options. When you’re ready, click Finish and your call-to-action button will go live.
Add a pinned post
Is there important information you want all visitors to your Page to see? A promotion you don’t want them to miss? A top-performing piece of content you want to show off? Put it in a pinned post.
A pinned post sits at the top of your Facebook Page, just under your cover image, so it’s a great place to put an attention-grabbing item that will draw your visitors in and make them want to stick around.
Start by writing a normal post, or scrolling down your feed to find an existing post you want to pin to the top of your Page. Click the three dots on the top right of the post, then click Pin to Top of Page.
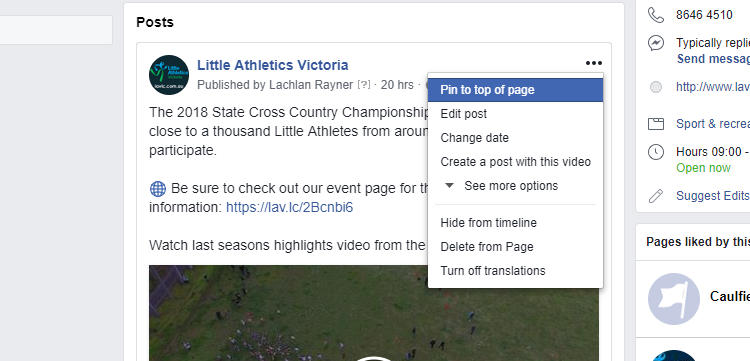 Once you’ve pinned the post, you’ll see a blue thumbtack icon in the top right corner.
Make the most of tabs
Tabs appear on the left-hand side of your Facebook Page, and include standard options such as the About section and photos. You can take your Page to the next level by adding other tabs and apps that enhance the user experience.
Facebook tab apps, such as TabSite, allow you to build custom tabs so that you can run campaigns and contests, share special offers, and capture leads.
If you are a developer or are working with a developer, and your Page has more than 2,000 fans, you can also create custom tabs from scratch. For more information on this, see the Facebook for Developers guide on Using Page Tabs.
Like other Pages
Since Facebook is, after all, a social network, it’s a good idea to use your Page to build a community for your business rather than viewing it as simply an extension of your online presence. One way to build community is to feature other Pages that are relevant to your business but not competitors.
For example, if you run a shop in a popular shopping area or mall, you could feature other shops in the same area, like an online version of your local business improvement association or chamber of commerce. If you have a virtual business, you could feature other businesses in your industry that could provide additional value for your followers without competing directly with your products.
Here’s how this looks in practice on the Hootsuite Facebook Page:
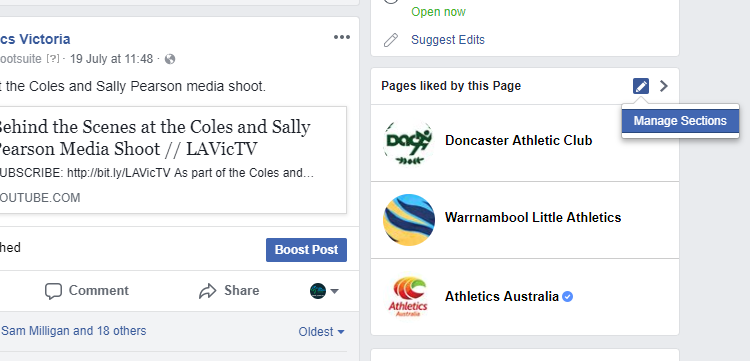 To feature a Facebook for Business Page in your Likes Pages section, click the more icon (three dots) under the Page’s cover photo, then click Like as Your Page. If you have more than one Facebook Business Page, choose which one you want to use to Like the other business, then click Submit.
Review your settings
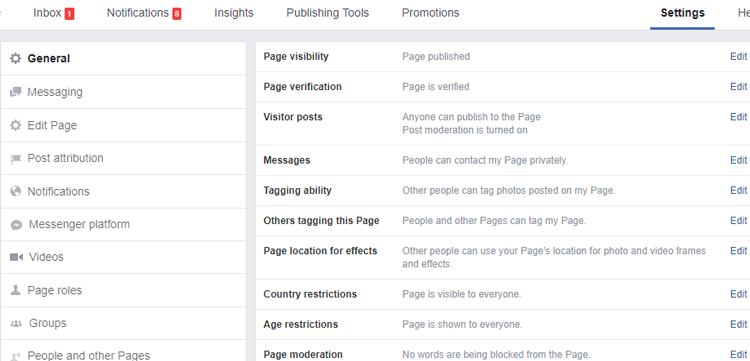
Your Facebook Page settings allow you to get into some pretty fine details about who can administer the page, where the page is visible, words banned from the page, and so on. You can also see how fans are interacting with your Page, including who has favorited it, and so much more.
Think of the Settings tab as your behind-the-scenes console for every adjustable parameter available to you. Take a few minutes to go through each setting and make sure that it’s optimized for how you want to manage the Page and how you want your audience to interact with you.
To access your settings, just click Settings at the top right of your Facebook Page.
 It’s important to check your settings regularly, as your preferences and requirements may change as your business—and social following—grows.
Learn from Page Insights
The more information you have about your audience, the more content you can create to satisfy their needs. Facebook’s Page Insights makes it easy to gather data about how your fans are interacting with your Page and the content you share.
Insights gives you information about your Page’s overall performance, including data on audience demographics and engagement. You can see metrics on your posts so you can understand how many people you’re reaching. You’ll also see how many comments and reactions are gained from specific posts—data that helps you plan future content.
A key feature of Insights is the ability to see how many people have clicked on your call-to-action button, website, phone number, and address. This data is divided by demographics such as age, gender, country, city, and device, making it easier for you to tailor future content to your audience.
Link to your Facebook Page from other web pages
Backlinks help boost the credibility of your Facebook Business Page and may help improve your search engine ranking.
Simply link to your brand’s Facebook Page wherever you can. Include a link at the bottom of your blog posts and where appropriate on your website. Encourage other companies and bloggers to do the same whenever possible, such as when sharing content or mentioning your business.
